How To Create Affiliate Product Boxes With Flauntopia | Boost CTR
This simple guide will walk you through the easy steps to create and embed your very own product boxes, no coding expertise required!

Follow the below steps to create and display the affiliate product box in your blog.
Step 1: Create Flauntopia Account. (Takes a Minute).
To create a product box, you first need to create a Flauntopia account. Flauntopia is a product display tool that you can use to create beautiful, animated product boxes for your blog.
Step 2: Add Website To Flauntopia. (takes some seconds).
After creating your account. Flauntpia will ask you to add your website.
Add your website to your flauntopia account in which you want to show the product boxes.
Step 3: Connect Flauntopia To Your Blog (Wordpress, Blogger, Wix, Shopify, etc whichever CMS Plateform You Use) it just takes a minute.
To display product boxes from Flauntopia on your website, you need to connect the Flauntopia platform to your blog (website) which you've added in your flauntopia account. Please refer to the links below, which are tailored to your specific Content Management System (CMS):
How to connect flauntopia to blogger.
How to connect flauntopia to wordpress.
How to connect flauntopia to shopify.
Step 4: Create Product Box
Now we can start creating the product box. Identify the website where you want to display your beautifully crafted product box. Whether you're using WordPress, Shopify, Wix, or a custom-built HTML site, our platform is designed to integrate seamlessly.

Step 5: Create Your Product Box in Our Intuitive Builder
Click the "Add New" or "Add+" Button on your dashboard. Clicking this will open our user-friendly product box creation form.
Fill in Your Product/Service Details: This is where you bring your offering to life!
Save Your Masterpiece: Once you've entered all the necessary details to your liking, click the "Save" button.
Congratulations, your product box is now created with the default design! Learn how you can display it in your website.
How does my product box look when I create it?
You can always see how your product box looks in the customization section by selecting the particular product box.
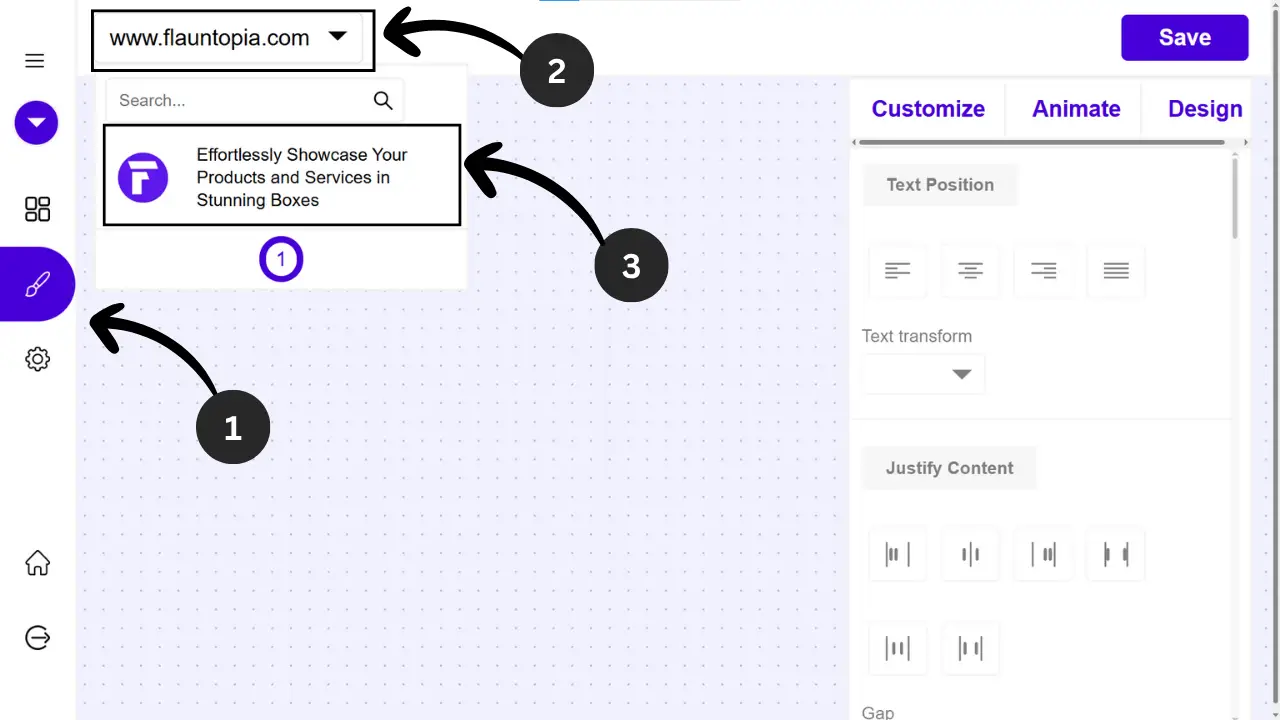
After selecting your product box, the box looks like this depending on the default styles.

You can always change the look and feel of product box in this customization section (this includes design customization, Adding animation, changing layouts).

Step 6: Display product into your blog.
To display product box into your blog post simply copy the product box code generated after the product box creation.


Now after copying the product box code, simply paste it into the blog post. For more details according to CMS plateform you use check the below guides:
- How to display product box into blogger.
- How to display product box into wordpress.
- How to display product box into shopify.

Comments
Post a Comment